 Skip to content
Level 2 EV charger installation is defined as connecting a dedicated 240V circuit from your home’s electrical panel to a wall-mounted charging unit, delivering significantly faster charging than a standard 3-pin socket. A Level 2 charger, known in the industry as an EVSE (Electric Vehicle Supply Equipment) operating at 7kW or above, can fully charge most electric vehicles overnight. That speed advantage over a standard Level 1 socket makes it the practical choice for daily home charging. Getting the installation right requires understanding your panel capacity, obtaining the correct permits, and working with a qualified electrician.
What electrical requirements are needed for level 2 EV charger installation?
Your electrical panel is the starting point for any home EV charger setup. Before anything else, you need to confirm it can handle the additional load. A 32A charger requires a dedicated 40A double-pole breaker, and a 48A charger requires a 60A breaker, following the 125% continuous load rule set out in NEC 625.41. The wire gauge must match: 8 AWG cable for a 32A charger, and 6 AWG for a 48A unit.
Panel headroom is more complex than counting spare slots. Physical slots alone do not guarantee your panel has the electrical capacity to support an EV load safely. A proper load calculation, equivalent to the NEC 220.82 method used in the US and mirrored in UK BS 7671 wiring regulations, tells you whether your panel can absorb the new demand without tripping or overheating.
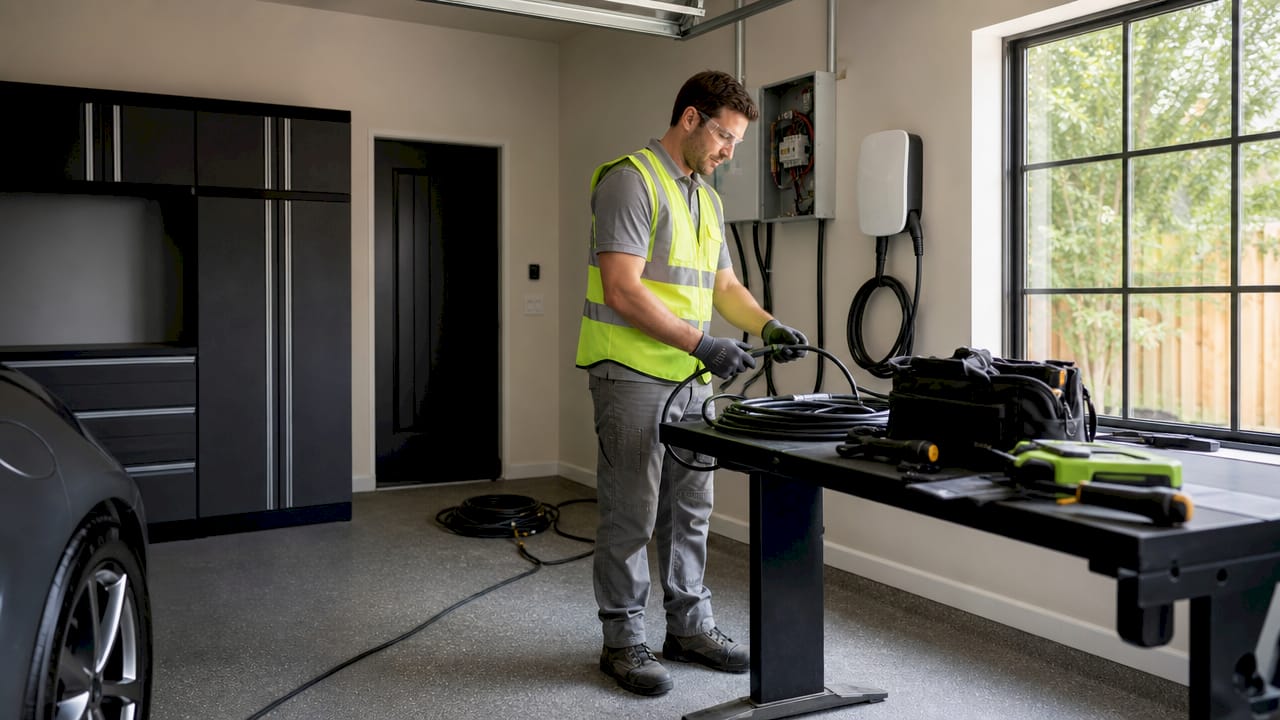
Pro Tip: Before calling an electrician, you can run a basic load calculation yourself using your panel’s total amperage and your current appliance loads. This helps you avoid unnecessary upsells on panel upgrades that may not be needed.
You also need to decide between a plug-in NEMA 14-50 outlet connection and a hardwired installation. The key facts are:
- A plug-in connection suits chargers up to 32A and offers flexibility if you move home
- Hardwired installation is mandatory for chargers rated above 40A continuous load, as NEMA 14-50 outlets are rated to a maximum of 50A
- Some local authorities and building regulations require hardwired connections regardless of amperage, so always check your local code
- A dedicated circuit breaker is non-negotiable for both types; sharing a circuit with other appliances is a code violation and a fire risk
- An electrical permit and inspection are required in most UK and US jurisdictions before the charger is energised
Permit fees typically add a modest sum to the overall project cost, but skipping this step creates far larger problems down the line.
How to plan and execute the installation step by step
A well-planned installation follows a clear sequence. Knowing what to expect at each stage prevents delays and keeps the work safe.
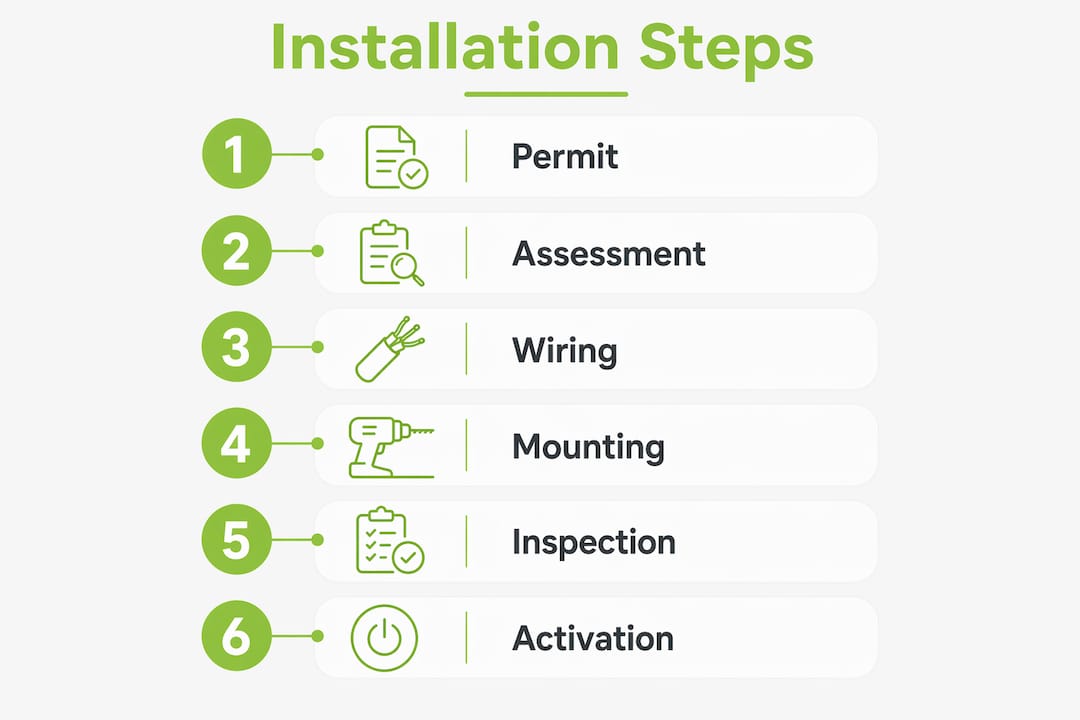
- Assess your panel. Confirm breaker slot availability and run a load calculation. If your panel is at capacity, budget for an upgrade before proceeding.
- Choose your charger location. Mount the unit close to your parking space to minimise cable run length. Shorter runs reduce material costs and voltage drop.
- Obtain your permit. Submit your application to your local authority or building control. City permit reviews can take up to 20 business days, so apply early.
- Disable the main power. Your electrician isolates the supply before any work begins. Never attempt this step without a qualified professional.
- Install the dedicated breaker. The correct double-pole breaker is fitted into the panel, sized to 125% of the charger’s continuous load rating.
- Run the cable. The appropriate gauge cable is routed from the panel to the charger location, either through conduit or within the wall cavity, depending on your property’s construction.
- Mount and connect the charger. The unit is fixed at a compliant height, typically between 900mm and 1,200mm from the floor, and wired to the circuit.
- Set current limits. The charger’s internal settings are configured to match the breaker rating, preventing the circuit from being overloaded.
- Book the inspection. A qualified inspector signs off the work before the charger is used.
Pro Tip: Book your permit application and your electrician at the same time. Physical electrical work takes just 2–6 hours, but the total project can run 1–4 weeks due to permit and inspection scheduling. Aligning both early keeps the timeline tight.
| Stage | Typical duration |
|---|---|
| Permit application and review | 5–20 business days |
| Electrical work (labour) | 2–6 hours |
| Inspection and sign-off | 1–5 business days |
| Total project timeline | 1–4 weeks |
For a detailed breakdown of what the home installation process involves at each stage, Centralec-electrical’s guide covers the full sequence with UK-specific guidance.
What are the most common installation challenges?
Most installation problems are predictable. Knowing them in advance saves money and avoids failed inspections.
- Misreading panel capacity. Homeowners often assume a spare breaker slot means spare capacity. Load calculations using NEC 220.82 equivalents reveal the true picture. An electrician who skips this step is cutting corners.
- Skipping permits. This is the single most costly mistake. Insurers may deny claims for fire or electrical faults if the installation was not permitted and inspected. Unpermitted work also complicates property sales.
- Choosing the wrong connection type. A plug-in outlet suits lower-amperage chargers, but some local codes require hardwired connections regardless of amperage. Confirm your local requirements before purchasing the charger.
- Underestimating wiring run costs. A charger mounted far from the panel means more cable, more labour, and higher cost. Positioning the charger on the wall closest to your consumer unit cuts both.
- Unexpected panel upgrades. If your panel genuinely cannot support the load, an upgrade is unavoidable. This is the most significant cost variable in any EV charger installation cost calculation.
Skipping the permit process to save time is a false economy. An unpermitted installation can void your home insurance, fail a property survey, and require costly remedial work before you can sell. The permit exists to protect you, not to slow you down.
Choosing a qualified local electrician who understands UK wiring regulations (BS 7671) and your local authority’s requirements is the single most reliable way to avoid every challenge on this list.
How to maintain and get the best from your charger
Post-installation care extends the life of your charger and keeps it safe. A few straightforward habits make a real difference.
- Inspect the cable and connector monthly. Look for fraying, discolouration, or heat damage around the plug. Any visible damage warrants an immediate call to a qualified electrician.
- Update firmware regularly. Most modern smart chargers receive over-the-air updates that improve safety logic and charging efficiency. Check the manufacturer’s app or web portal every few months.
- Use scheduled charging. Many chargers allow you to set off-peak charging windows, typically overnight, when electricity tariffs are lower. This reduces running costs without any extra effort.
- Monitor your energy usage. Smart chargers with built-in energy monitoring let you track exactly how much electricity your vehicle consumes. This data is useful for expense claims if you use your vehicle for work.
- Review compliance after home electrical changes. If you add solar panels, a heat pump, or carry out a rewiring project, ask your electrician to recheck that your EV charger circuit still meets BS 7671 requirements. Changes to your home’s electrical load profile can affect the charger’s safe operating conditions.
For a broader view of home EV charging in the UK, including tariff advice and charger compatibility, Centralec-electrical’s driver guide covers the practical detail most manufacturers leave out.
Key takeaways
A safe and compliant level 2 EV charger installation requires a dedicated 240V circuit, the correct breaker size, a valid permit, and a qualified electrician who understands UK wiring regulations.
| Point | Details |
|---|---|
| Panel capacity first | Run a load calculation before buying a charger to confirm your panel can support the new circuit. |
| Breaker sizing is fixed | A 32A charger needs a 40A breaker; a 48A charger needs a 60A breaker, per the 125% continuous load rule. |
| Permits protect you | Unpermitted installations can void home insurance and complicate property sales. |
| Timeline is permit-driven | Physical work takes 2–6 hours, but the full project runs 1–4 weeks due to permit and inspection scheduling. |
| Hardwired above 40A | Chargers drawing above 40A continuous load must be hardwired; plug-in connections are not code-compliant at that amperage. |
What I’ve learnt after 23 years of EV charger installations
The conversation I have most often with homeowners goes like this: they’ve already bought the charger, they’ve picked a spot on the garage wall, and they want it installed by the weekend. Then we open the consumer unit and find the panel is at capacity, or the chosen location means a 15-metre cable run through two walls.
The lesson is simple. Plan the installation before you buy the charger, not after. A five-minute conversation with a qualified electrician about your panel and your parking arrangement can save you hundreds of pounds and several weeks of delay.
Permits are the other area where I see homeowners take shortcuts they later regret. I understand the frustration. Waiting three weeks for a building control sign-off when the physical work takes four hours feels disproportionate. But an unpermitted charger is a liability. If there is ever a fault, your insurer will ask for the inspection certificate. If you sell the house, the buyer’s solicitor will ask for it too. The paperwork is not bureaucracy for its own sake. It is your protection.
My practical advice for UK homeowners: choose a NICEIC-approved contractor who handles the permit application as part of the job. That single decision removes the most common source of delay and error from the entire process.
— Craig
Professional EV charger installation in the South West
Centralec-electrical has carried out EV charger installations across the South West for over 23 years, working to NICEIC-approved standards with transparent, fixed pricing and no hidden costs.

Whether you need a straightforward 7kW home charger or a higher-amperage unit requiring a panel assessment, the team handles everything from permit application through to final inspection sign-off. You can review the full installation requirements and costs on the Centralec-electrical website, or explore the installation requirements page to understand exactly what your property needs before committing to a quote. Get in touch for a no-obligation consultation tailored to your home and vehicle.
FAQ
What is a Level 2 EV charger?
A Level 2 EV charger is a 240V EVSE (Electric Vehicle Supply Equipment) unit that charges an electric vehicle significantly faster than a standard 3-pin socket. Most units deliver between 7kW and 22kW, enough to fully charge a typical EV overnight.
How long does a Level 2 EV charger installation take?
The physical electrical work takes 2–6 hours, but the total project duration runs 1–4 weeks once permit applications and inspection scheduling are factored in.
Do I need a permit to install a Level 2 charger at home?
Yes. An electrical permit and inspection are required in most UK jurisdictions. Skipping permits risks insurance rejection and complications when selling your property.
Should my Level 2 charger be hardwired or plug-in?
Chargers drawing above 40A continuous load must be hardwired. Below that threshold, a NEMA 14-50 or equivalent plug-in connection may be acceptable, but local code determines the final answer. Always confirm with your electrician before purchasing.
How do I know if my electrical panel can support a Level 2 charger?
Count your spare breaker slots, then run a load calculation using the BS 7671 equivalent of NEC 220.82 to check actual electrical capacity. Physical slots alone do not confirm capacity. A qualified electrician can complete this assessment in under an hour.